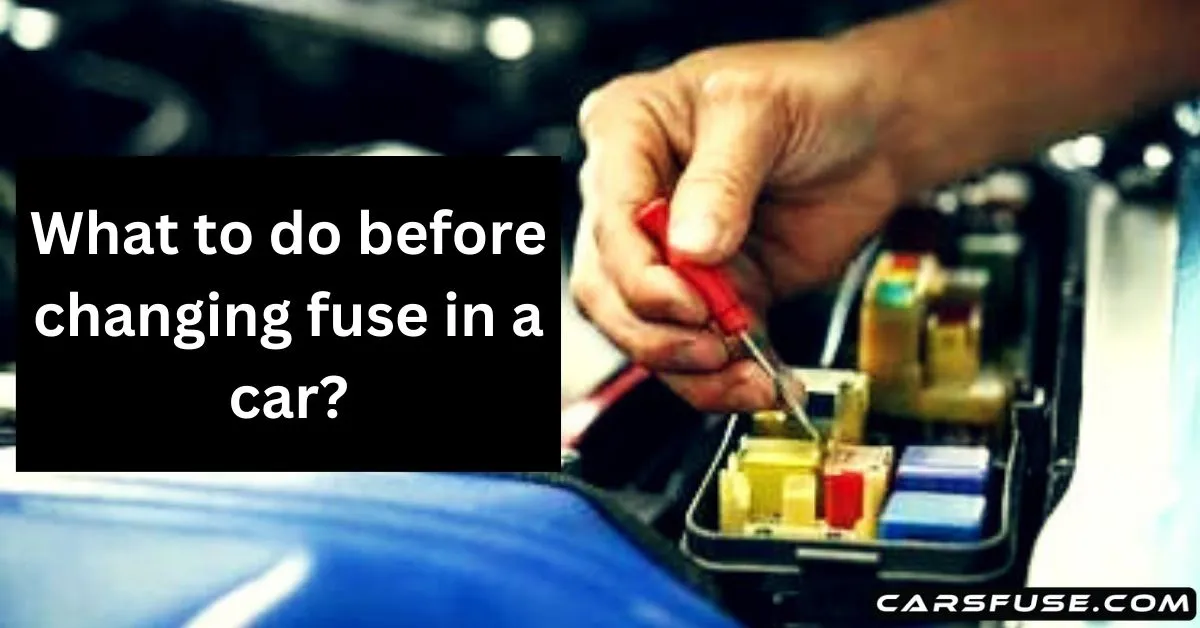
Before replacing a fuse in your car, it is essential to take certain precautions and follow proper preparation steps. This ensures your safety and prevents further damage to the electrical system. Fuses are delicate components that can be easily damaged if mishandled or installed incorrectly.
Moreover, attempting to replace a fuse without the necessary knowledge and tools can lead to electrical hazards or create more extensive electrical problems in your vehicle. By taking the time to prepare adequately, you can avoid unnecessary risks and potential damage to your car’s electrical system.
With the following steps for the fuse replacement, you can proceed confidently with the fuse replacement process operating as intended.
Table of Contents
1. Essential Tools required
This proactive approach ensures that you have everything you need and minimizes the risk of complications during the fuse replacement process. By gathering the necessary tools, you will be well-prepared to safely change a fuse in your car.
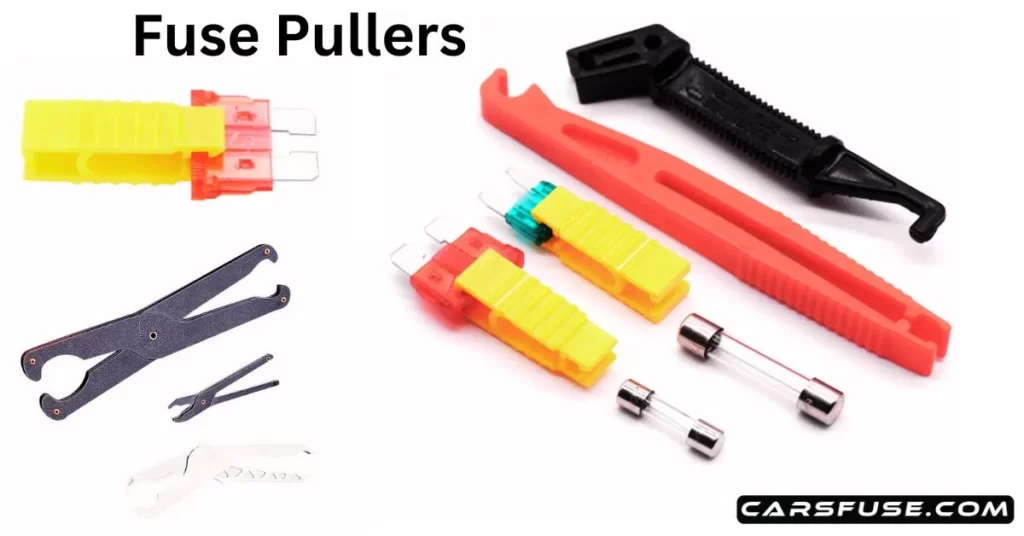
- Fuse puller or a pair of needle-nose pliers: These tools help safely remove the fuse from its slot.
- Flashlight: A flashlight will assist you in locating the fuse box, especially if it’s located in a dimly lit area.
- Replacement fuses: It’s essential to have the correct replacement fuses on hand. Refer to your car’s manual or the fuse box cover for the correct amperage rating and fuse type.
2. Identifying the specific fuse type and amperage rating

Different electrical circuits in your car may require different amperage ratings and fuse types. To ensure you have the correct replacement fuse, refer to your car’s manual or the fuse box cover. It will provide information about the specific fuse type (e.g., mini blade, micro blade, maxi) and the corresponding amperage rating for each circuit. Using the wrong fuse with an incorrect rating can lead to electrical problems or even cause damage to your car’s electrical system.
3. Ensure vehicle safety
Safety should always be a top priority when performing maintenance tasks on your vehicle. By following these vehicle safety measures, you create a secure environment for yourself and reduce the likelihood of any accidents or injuries while working on the fuse replacement process.
- Park the car in a safe area: Park your vehicle in a safe location away from traffic choose a well-lit area where you have ample space to work comfortably.
- Turn off the engine: To prevent any accidental movements turn off the engine completely. This ensures that there is no power running through the electrical system while you are working on the fuses. The engine and surrounding components can become hot, posing a burn risk.
- Allow the engine to cool down: If you have recently been driving your car, allowing sufficient time for the engine to cool down ensures your safety and minimizes the risk of accidental burns.
- Remove the car key from the ignition: This eliminates the possibility of inadvertently starting the engine or engaging any electrical controls while working on the fuse box.
4. Locate the Fuse Box
Every car has a fuse box that houses the fuses for various electrical circuits. To locate the fuse box in your vehicle, start by referring to your car’s manual. The manual will provide valuable information about the fuse box’s location and may also include a fuse box diagram that indicates the position and function of each fuse.
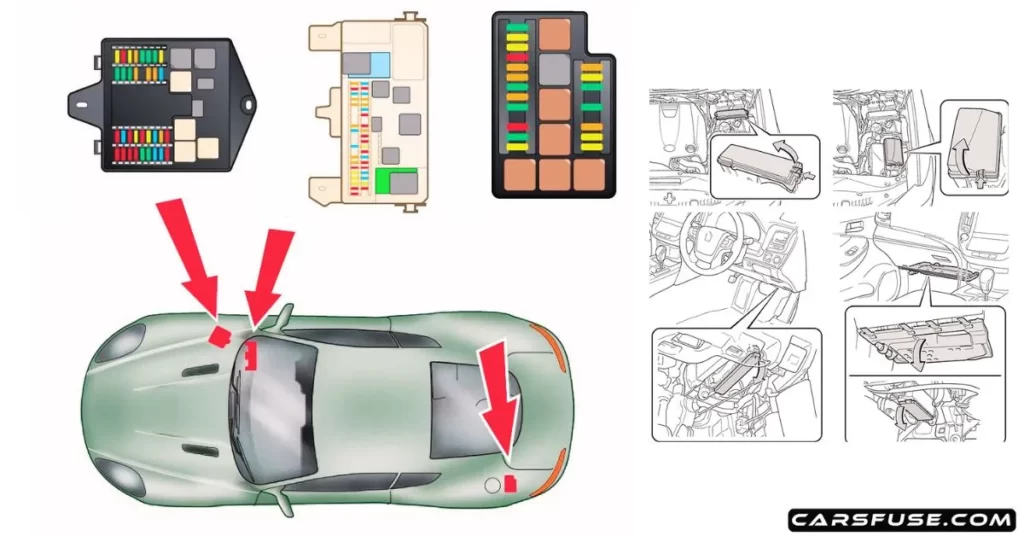
The fuse box can be located in different areas of the car, depending on the make and model. Common fuse box locations include:
- Under the dashboard: This is the most common location for the fuse box. It is typically located above the driver’s or passenger’s feet, beneath the dashboard.
- Under the hood: Some vehicles have a secondary fuse box located in the engine compartment, usually near the battery or near the firewall.
- Side panels: In certain cars, the fuse box may be located in the side panels of the dashboard or the trunk.
5. Understand the fuse box layout
After finding the fuse box in your vehicle, examine the cover or inside of the lid closely. Many fuse boxes contain labels or descriptions that explain which circuits each fuse is responsible for protecting. These labels might use abbreviations or symbols to indicate the electrical components or systems associated with each fuse. Dedicate some time to reviewing these labels and comprehending the unique functions and corresponding fuses.
Identify the fuse corresponding to the malfunctioning circuit Based on the information obtained from the fuse box labels, determine which fuse corresponds to the malfunctioning circuit you are addressing. If the fuse box does not have explicit labels, refer back to your car’s manual or conduct an online search for a fuse box diagram specific to your vehicle.
By studying the fuse box labels and descriptions, as well as identifying the specific fuse associated with the malfunctioning circuit, you will have a clear understanding of the fuse box layout. This knowledge allows you to proceed confidently with the fuse replacement process and ensures that you address the correct fuse for the circuit in need of repair.
6. Inspect the fuse carefully
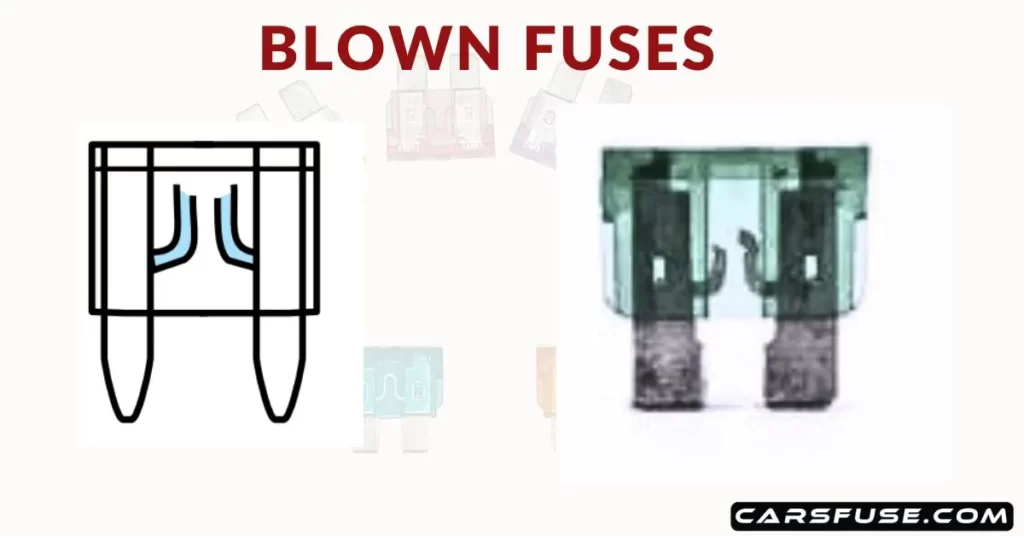
Examine the fuse for signs of damage or a blown filament after removing the fuse from its slot. A blown fuse typically has a broken or melted filament inside, which indicates that the fuse has been overloaded or there is a fault in the circuit. Look for any discoloration, blackening, or a visibly broken filament. If the fuse appears to be intact without any signs of damage, it may not be the cause of the electrical issue.
If you notice any damage or a blown filament in the fuse, it is important to replace it. But before doing so, it is essential to find and fix the root cause that led to the fuse blowing. Electrical problems can arise from various factors like short circuits or faulty components. If the same fuse keeps blowing repeatedly, it indicates an ongoing problem that must be resolved to avoid additional damage.
7. Remove the defective fuse
It is important to handle the defective fuse with care. Avoid touching the metal ends of the fuse, as they may still be conducting electricity or hot from recent use. Place the removed fuse in a safe location, away from any flammable materials, to prevent any potential hazards.
Use a fuse puller tool or a pair of needle-nose pliers To safely remove the defective fuse from the fuse box, you can utilize a fuse puller tool or a pair of needle-nose pliers. If a fuse puller is not available, carefully use a pair of needle-nose pliers to grip the fuse. Ensure that the pliers are not touching any metal parts of the fuse or the fuse box to prevent any electrical shock.
Gently grasp the defective fuse and carefully pull it out with the fuse puller tool or needle-nose pliers. Firmly but smoothly pull the fuse straight out of its slot. Avoid applying excessive force or twisting motions, as this can lead to damage to the fuse or the fuse box. Take your time to ensure a steady and controlled removal of the fuse.
8. Insert the replacement fuse
Before inserting the replacement fuse, ensure that it matches the amperage rating and fuse type specified for the circuit. Refer to your car’s manual or the fuse box cover for the correct amperage rating. Also, ensure that the replacement fuse is of the same type as the original fuse (e.g., mini blade, micro blade, maxi) to ensure a proper fit. It is important to handle the replacement fuse with clean hands or use gloves to prevent any oils, dirt, or moisture from affecting its performance. Contaminants on the fuse can lead to poor electrical connections or even fuse failure.
Hold the appropriate replacement fuse and align it carefully with the corresponding slot in the fuse box. Insert the fuse into the slot with a gentle push until it is firmly seated. Make sure to insert it straight and fully, establishing a strong connection. Avoid using excessive force or putting the fuse in the wrong slot to prevent any harm to the fuse or the fuse box. After inserting the replacement fuse, take a moment to confirm that it is correctly positioned and securely seated in the fuse box. Verify that it matches the circuit’s required amperage rating and fuse type, ensuring a proper fit.
9. Test the new fuse and verify the functionality
After inserting the replacement fuse, it’s time to test the functionality of the circuit. Turn on the car’s electrical accessories that are associated with the circuit for which the fuse was replaced. Observe the operation of the electrical accessories connected to the circuit to ensure they are functioning properly. If the circuit is operating as expected without any issues, it indicates that the replacement fuse is functioning correctly and has resolved the electrical problem.
While the circuit is in operation, pay attention to any unusual behavior or recurring issues that may indicate further electrical problems. If you notice any abnormalities such as flickering lights, intermittent operation, or the fuse blowing again, it suggests that there may be an underlying electrical issue that needs to be addressed. In such cases, it is advisable to seek professional assistance to diagnose and resolve the problem.
10. Fasten the fuse box and organize
Before closing the fuse box, check that all fuses are properly seated in their respective slots. Gently press down on each fuse to ensure it is securely in place. Once you have confirmed that all fuses are securely in place, carefully close the fuse box cover or lid. Ensure that it is aligned correctly and snaps or fastens securely. This helps protect the fuses from dust, moisture, and accidental contact, ensuring the continued functionality of the electrical system.
Take a moment to tidy up and organize any tools or materials you used during the fuse replacement process. This includes properly storing the fuse puller tool, needle-nose pliers, and any spare fuses. Keeping your workspace clean and organized helps prevent any potential hazards and makes it easier to locate tools or materials for future use.
Dispose of the defective fuse responsibly and in accordance with local regulations. Consider recycling options for electronic waste or consult your local waste management guidelines for proper disposal methods. Proper disposal helps minimize environmental impact and promotes responsible waste management practices.
If you're looking to find helpful guidance for troubleshooting car fuse issues, we've got you covered! Our collection of comprehensive articles provide you valuable information on a variety of topics related to car electrical system. We understand that fuse failures can be a common challenge, so explore the typical reasons behind these failures and offer practical solutions to resolve them effectively. Simply click the links provided below.

What causes car fuses to go bad?
Can I replace a car fuse by myself?
What are the most common car fuses?
How many fuse boxes does a car have?
What is the fastest way to check a car fuse?
Do you need to disconnect battery to change fuse?
How do you check car fuses without removing them?

Conclusion
If the replaced fuse does not resolve the electrical issue or if the fuse blows again shortly after replacement, it may indicate a more complex problem within the electrical system. In such cases, it is advisable to seek professional assistance when needed to ensure the safety and reliability of the vehicle’s electrical system.
It is important to recognize that certain electrical issues in a vehicle require specialized knowledge and equipment to diagnose and repair effectively. Continuing to replace fuses without addressing the underlying issue can lead to further damage or electrical hazards.
Tom Smith is a passionate car mechanic and automotive enthusiast, specializing in the intricate world of car fuse boxes. With years of hands-on experience under the hood, he has earned a reputation as a reliable expert in his field. As the founder and content creator of the popular blog website 'carsfuse.com,' Tom has dedicated himself to sharing his extensive knowledge of car fuse boxes and electrical systems with the world.

