1996-2002 Toyota Land Cruiser Prado (90/J90) Fuse Box Diagram
The second-generation Toyota Land Cruiser Prado (90/J90), produced from 1996 to 2002. It provides fuse box diagrams for models from 1996 to 2002, showing the location of the fuse panels inside the car and explaining the function of each fuse and relay.
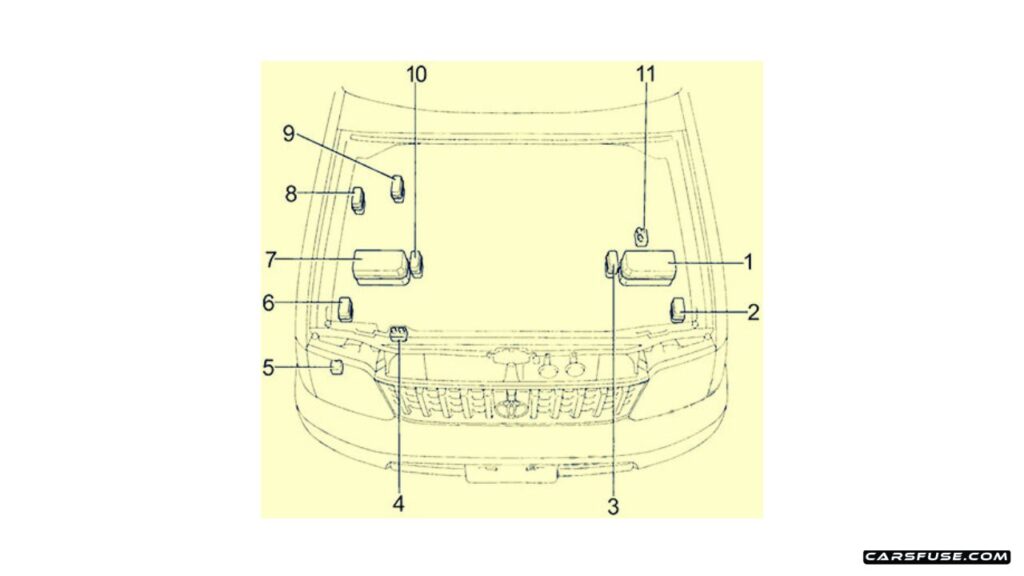
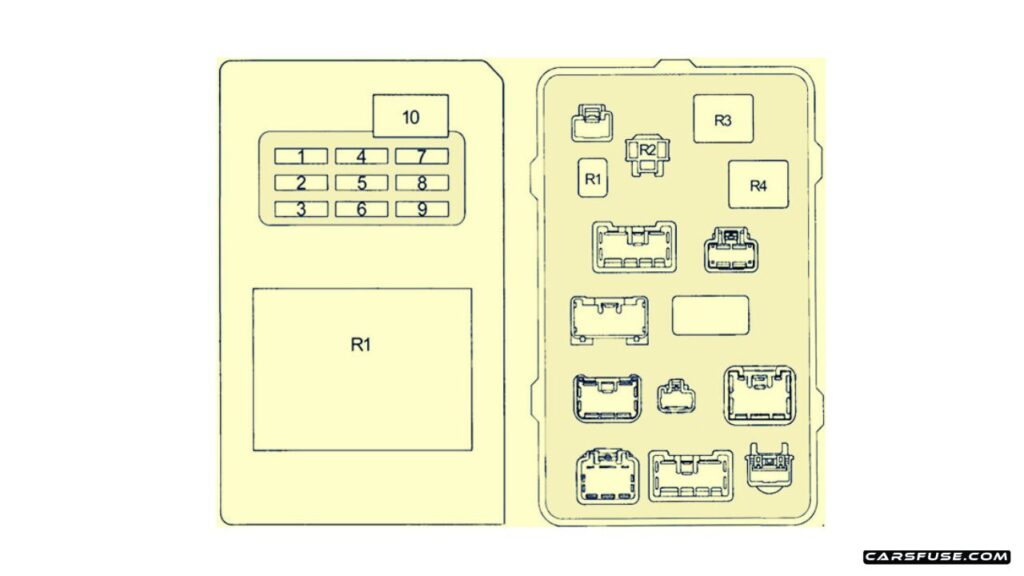
Combination Meter, back-up light, alternator, rear heater relay, ABS warning light, cruise control indicator light, accessory meter, 4WD control ECU, “P” position switch, sub fuel tank gauge, power relay, defogger relay, rear window defogger switch, seat belt warning light, door courtesy light, neutral start switch
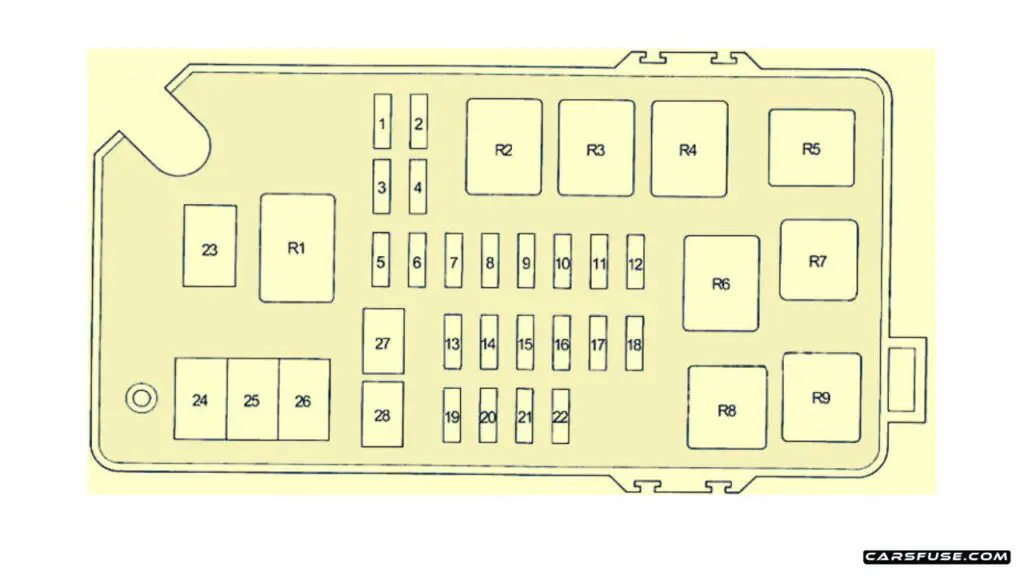
10
5
S-HTR
Seat heater
15
6
HORN & HAZ
Emergency flashers, horns
15
7
DIFF
4WD control ECU
20
8
ECU-B
Rear fog light, cruise control, wireless door lock ECU
15
9
ST
Starting system
5
10
WIPER
Front wiper and washer, rear wiper and washer
20
11
STOP
Stop lights, high mounted stop light, shift lock control system, anti−lock brake system
15
12
ECU-IG
Anti−lock brake system, cruise control
15
13
DEF
Rear window defogger
15
14
TAIL
Tail light, license plate light, headlight beam level control, door courtesy light, meter illumination, instrument panel and switches illumination, daytime running light relay
10
15
POWER
Power seat, integration relay (door lock), power windows, electric moon roof
30
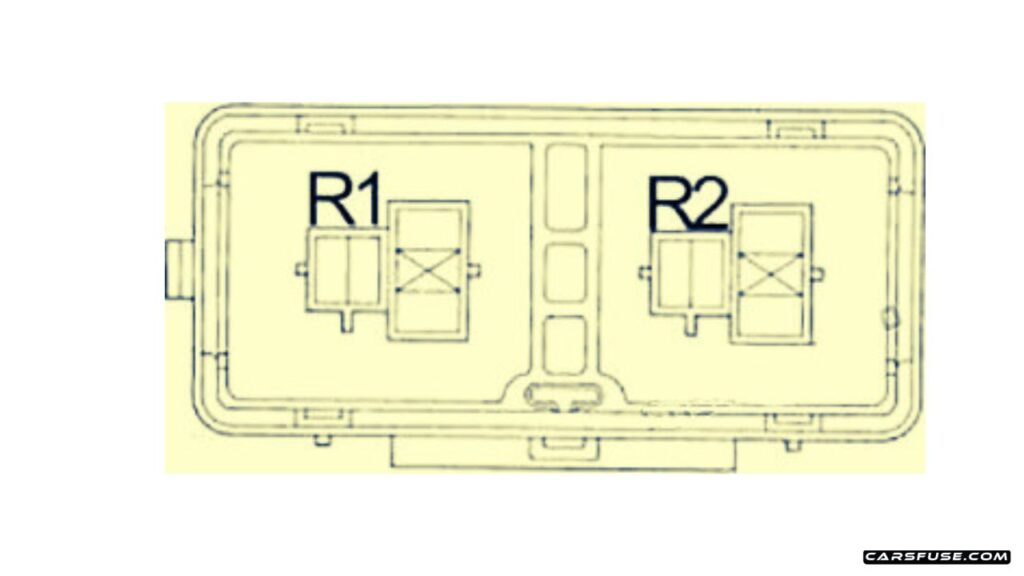
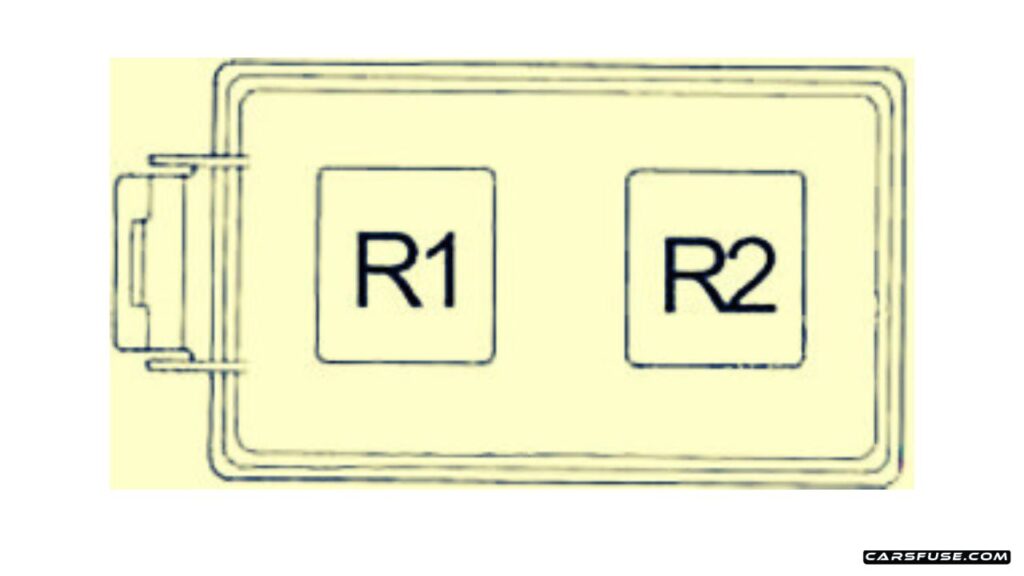
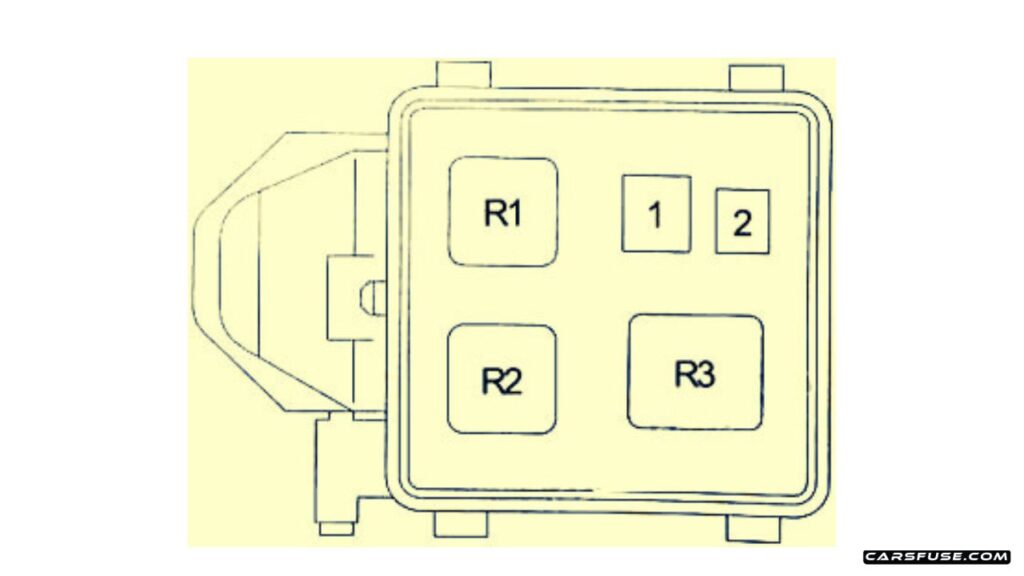
Relay Box
№
Relay
R1
5VZ-FE, 3RZ-FE with sub fuel tank: Sub fuel pump forcing driving 1KZ-TE: Spill valve
R2
–
Why Does the Alternator Fuse Blow in a Land Cruiser?
There are several reasons why the alternator fuse might keep blowing:
Wiring issues: If the wires between the alternator and battery are damaged, frayed, or touching metal parts, they can cause a short circuit. This leads to too much current flow, which blows the fuse to prevent damage.
Bad alternator: A faulty alternator can have internal problems, such as shorted windings or broken diodes. This can cause it to draw too much power and blow the fuse.
Too much electrical load: If the alternator is working too hard — for example, trying to charge a drained battery or power many devices at once — it can draw more current than the fuse can handle.
Wrong fuse used: If the fuse is rated lower than what Toyota recommends, it might blow even under normal conditions. The correct fuse should match the alternator’s expected power output.
Faulty voltage regulator: The voltage regulator manages how much power the alternator sends to the battery. If it fails and allows too much voltage through, it can overload the system and cause the fuse to blow.
Before you replace the fuse, it’s important to fix the underlying issue. Inspect all wiring, connectors, and parts of the charging system to make sure the problem doesn’t happen again.
Where are the fuse boxes located in the 90/J90 Prado?
The Prado 90/J90 has two main fuse boxes: one in the engine compartment near the battery, protecting high-current circuits like the radiator fan, ABS, and starter, and another inside the cabin on the driver’s side under the dashboard, controlling interior and accessory circuits.
How do I identify the correct fuse for a specific component?
Use the fuse box diagram printed on the cover or in the owner’s manual. Each fuse is labeled with its function and amperage. High-current fuses typically protect critical systems such as the fuel pump or ignition, while lower-amperage fuses safeguard lights, indicators, and electronic accessories.
What is the correct procedure for testing and replacing fuses in the 90/J90 Prado?
Turn off the ignition and remove the fuse using a fuse puller or needle-nose pliers. Inspect the metal filament inside; if it’s broken, replace the fuse with one of the exact same amperage. Avoid replacing with a higher-rated fuse, as it can cause wiring damage or component failure. For repeated failures, check wiring, connectors, or the related module.
Are there any common fuse-related issues in the 90/J90 Prado?
Yes. Common problems include blown fuses for the fuel pump, ABS, or interior lights. Aging wiring, corroded connectors, or aftermarket accessories often trigger repeated fuse failures. Systematic inspection of the affected circuit using a multimeter is recommended for diagnosis before replacing fuses repeatedly.